

Discord is a massive social media platform over 20 million people use daily. While Discord is a very popular platform for gamers, a wide variety of people worldwide use the app to engage with friends and interest groups. In recent years, many creators have used Discord to host communities within a custom server. It’s a great way for creators to connect with their audience on a deeper level, host community events, and foster greater loyalty among their followers. Some creators have monetized their Discord communities by restricting access to paid platforms like Patreon. Regardless of your niche, having a Discord server dedicated to your community can dramatically increase engagement, audience loyalty, and brand awareness. Building a community Discord server is simple and requires zero website development skills. This outline will cover everything you need to do to set up your very own creator-focused Discord community.
Sign up for a Discord account
Of course, the first step in creating a Discord server is creating a Discord account if you don’t already have one. Creating an account is simple and free and only requires a valid email address. Discord is available on all mobile app stores and Mac and PC. Choose an appropriate username- you can always change it later if you’re unsatisfied. Now that you have your Discord account, you can build your server.
Create a new server
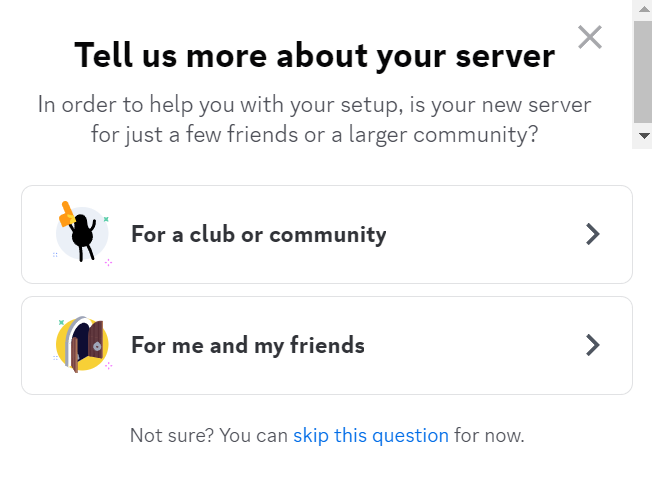
With your new Discord account, you can now create a Discord server. In the leftmost sidebar on your homepage, tap the + icon to add a new server. When doing so, Discord will prompt you to enter a name and a cover photo for the server. They will also ask you what type of server you want to create. Make sure you select “Community” for this option. There’s nothing wrong with the other server formats, but the Community option unlocks more features that are not available in other server types, such as Community Events. The process of actually creating the server should take less than a minute.
Plan your channels and server layout
Discord servers are composed of various text and voice channels. Before you add random channels, consider what type of community you wish to host and go from there. You will also want to map out a general server layout. If you’re a total newbie to Discord, looking at existing servers and determining what you like or dislike about their layout will be beneficial. When choosing channels to include, don’t worry if you cannot immediately come up with everything. Community members often tell you the channels they want to see, so if you skip adding something, trust that your audience will let you know.
Build the server structure
Now that you’ve determined the general layout of your server and brainstormed some channel ideas, you can start making categories and channels. Categories serve as the “dividers” that segment your server’s sections, like folders on a computer. Within each category, you can have lots of different channels. Be sure not to put too many channels in a certain category, otherwise, your server becomes difficult to navigate. Within the server, you can create a category by clicking the top bar where the server’s name is located and selecting from the drop menu “Create Category.” For channels, simply click the + symbol next to the category name to add a channel to that category.
Write rules and guidelines
Whenever you host a Discord community server, you will want to establish rules and guidelines. You should post these in a very clear, easily accessible location that members see upon joining. What you include in your rules is entirely up to you, but write rules that will make your community a fun, safe and inclusive environment. Setting rules from the start is far easier than enforcing rules after problems occur. You can constantly update and adjust the rules later. For Discord Community servers, you must have posted rules for the server to be deemed an official Community and receive the associated benefits.
Appoint moderation staff

When running and maintaining a Discord server, it’s critical to appoint trustworthy, competent server staff members who will help you run the place. This is especially important if you have a large following and expect many people to join your server. You cannot monitor your server 24/7, so having moderators around to enforce the rules and help people with questions they may have will save you a lot of time and headaches. Make sure that whoever you appoint as a moderator is someone you trust- after all, they will act on your behalf and can change the community, including banning members. If you are new to Discord, appointing a server staff member with experience running and moderating a server would be extremely helpful.
Upload custom emotes and stickers
To personalize your community, you can upload custom emotes and stickers. While it seems like a silly step, by offering your community specialized emotes, you are enriching their experience and earning free advertisement. Community members with Nitro can use your custom emotes across all of Discord, generating brand awareness for you! Make the custom emotes and stickers relevant to your audience and brand. If you are struggling to develop emotes on your own, tons of amazing artists on Etsy can design them for you!
Create roles
One of the last steps is creating roles. Roles are special profile tags that members can self-assign using a bot feature, and they enhance user profiles within the server. Some extremely common roles for Community servers include age roles, pronouns, and if the user accepts DMs from others. Roles are easy to create: simply navigate to Server Settings and select “Roles” from the menu. You can use many free Discord bots, such as YAGBot or Carlbot, to generate role menus for self-assignment.
Open the server to your audience

By this point, you’ve officially created your server. Don’t obsess over the fine details- you, or a trusted staff member, can always edit and improve things later on! Now, you’re ready to open your server to your audience. Discord can auto-generate an invitation code from the drop menu. You can also customize the server invite to accept a finite number of users or set it to unlimited. You can even set an expiration for the invite link. These are very helpful if you want to initially open your server to a smaller number of users before opening it to all. If you put your server behind a paywall, you don’t need to post an invitation link on social media, but link it to a Patreon or other similar platform.
Congratulations on building your new community hub!
Discord is a fantastic way to foster a deeper sense of community among your audience. After all, these people share at least one common interest- you! By posting links to new uploads and content on the server, you can drive up initial engagement massively. You can also use the community Discord to connect with your audience and receive real-time feedback on your content. Many creators who run Discord servers will even let the community members offer suggestions and host votes to decide on new content ideas. This is a perfect solution if you are stuck in a creative rut or experiencing creator burnout. You and your new Discord community have unlimited options, so enjoy it and make the most of it.